For this studio painting I used Claessens double oil primed linen canvas, #15 (my usual painting surface). This painting, as with most of my larger paintings, was completed using a photograph as my reference. (My wife, Sarah, is the lovely lady in the photo. Somehow I doubt she would have been very excited to pose in the middle of a field long enough for me to do the painting from life.)

Step 1:
When doing a painting of this size (or larger), I am most comfortable starting with a fairly detailed drawing of my composition. In this case, I use vine charcoal directly on the canvas. I make sure to take as much time as necessary on this step since it will provide me with the direction I will follow for the rest of the painting. As I draw, I take careful measurements using my reference photo to make sure everything ends up the right size and in the right place. (On a side note, I carefully measure when painting smaller sizes too. I just don't necessarily do a charcoal drawing first.) I always double-check my drawing by looking at it in a mirror. Somehow seeing the image in reverse makes it easier to see my mistakes.

Step 2:
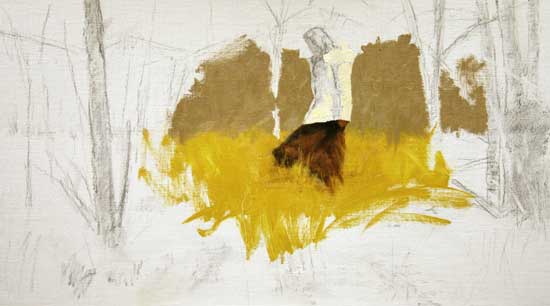
Now that I am ready to paint, I take a few moments to think about how I will proceed. When doing smaller paintings, I will often work on the whole painting at once. But, because this painting is a little larger, I decide to start in one area and work outwards. This way I have the freedom to stop if I need to, and when I return it won't matter if the paint has started to dry because I (hopefully) won't have to work on areas that I've already painted. (I always prefer to work wet-into-wet so I can easily handle my edges without having to repaint over dry paint.) Of course, this requires some planning as I begin, but it's also a fun way to work because I can see the painting begin to take shape fairly quickly. So now all I have to do is decide where to start! I've found that the easiest way for me to establish my value range for a painting is to start in an area with strong, dark values and some good contrast. For this painting, some of my darkest values are in the focal point (Sarah), so it makes sense for me to start there.

Step 3:
I do a lot of squinting at my photo and at my painting to compare the value relationships between shapes. If I get the relationships right, I will be able to continue through the painting without having to go back to change any of the values.
Step 4:
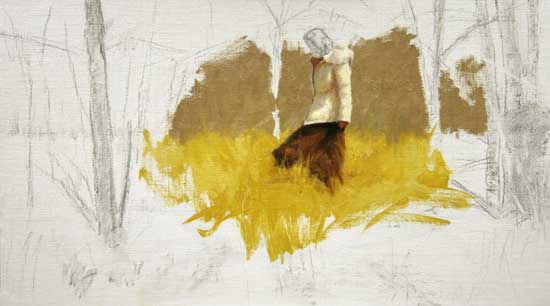
As I continue, I also pay attention the edges between shapes so that they won't all end up looking the same. In order to lead the viewer's eye to the focal point, I make sure to keep my sharpest edges there, while softening other surrounding edges in comparison. One of the keys to good edges is variety.
Step 5:
As I work on Sarah's white coat in the picture, I keep in mind that photographs have a tendency to incorrectly portray color information, especially in extremely light and dark areas. As a result, I must think about the sunlight from the day I took the photo and remember the effect its color temperature had on the entire scene. (This is where all of that continued practice painting from life pays off too, because I have information in my mind from experiences painting in these very conditions.) Since I remember that the color temperature of direct sunlight is warm, I make sure to add warm colors to all the areas of the coat that are in the direct light. As a result, the shadows are relatively cooler when compared to the light areas.
Step 6:
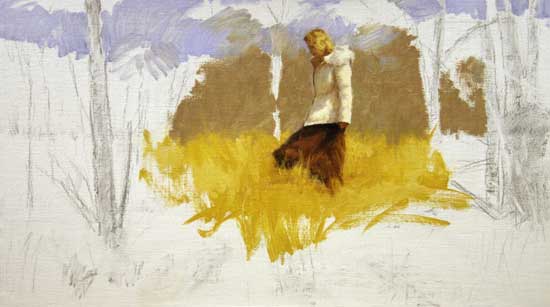
Sarah is now mostly finished (along with the most critical part of the painting.) The farther along I get in the painting, the more comparisons are taking place. Every shape I paint has to be correct in drawing accuracy, value, color, and edges when compared to what I have already painted. This is why it is so important for me to be accurate as I begin. If I get to this point and notice that one of those main components is incorrect, I will either have a lot of repainting to do, or it will be time to decide to just start over. (And yes, unfortunately this has happened.)
Step 7:
Fortunately, I don't see any glaring errors at this point, so I am free to start working on the background. The challenge of a background filled with trees is to keep from adding too much detail and distracting from the focal point. Yet another benefit of starting with the focal point is that now I can compare the rest of my painting with it and make sure that it still predominates. So I try to discern the major shapes in the trees and only put in what is necessary to give the impression of many trees and branches.
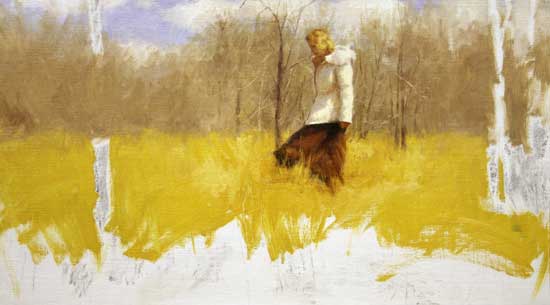
Step 8:
As I block in more of the background trees and foreground grasses, I keep the paint fairly thin. This allows me to apply thicker paint on top when I get into more detail, and I can also let some of this initial wash show through in the finished painting. Again, this gives me some variety of texture which is pleasing in the same way as variety in my edgework (which I mentioned in Step 4).

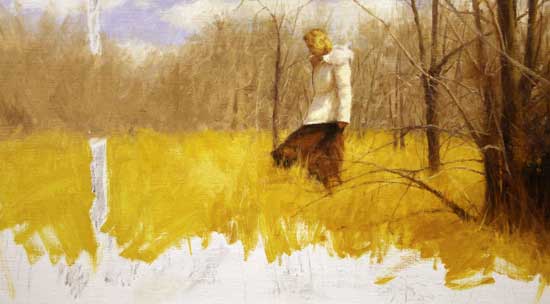
Step 9:
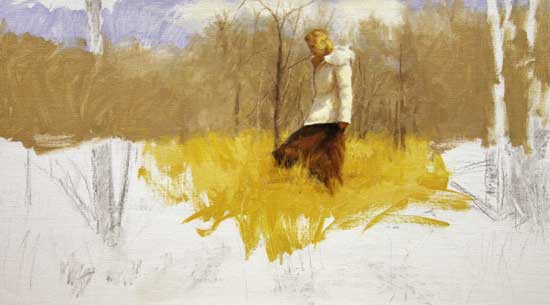
Now that I have the background all blocked in, the time has come to start working on the foreground trees. As I mentioned when I was ready to begin painting back in Step 2, I took a few moments to think about how to proceed. One of the things I took note of was that my darkest values in the scene were actually in these foreground trees. Therefore, I had to hold back a bit on how dark I made the shadows in Sarah's skirt so that when the time came to paint the foreground trees, they would be the darkest elements. This helps increase the illusion of depth in the painting since it "pushes" Sarah farther into the background because the darkest values on her aren't quite as dark as the foreground trees which should appear closest to the viewer. I also had to remember that my camera saw the shadows on Sarah's skirt and the value of the foreground trees to be about the same, which gave me another reason to be careful about how dark I made the shadows on Sarah's skirt.
Step 10:
I start adding details to the trees and grasses, taking care that they don't become too interesting in comparison with Sarah. After all, she's most important!
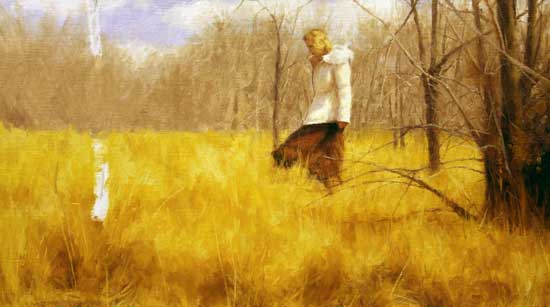
Step 11:
It looks like the whole right side of the painting is pretty much finished now. Painting the values correctly in the grasses at the bottom is somewhat tricky. I have to squint and make more comparisons between the grasses and other values in the painting so that the shadows and lights on the grasses will be correct. Just like painting the trees and branches, I try to look at the big shapes in the grasses so I don't get them too detailed.

Step 12:
Almost finished now! All that's left is to finish the trees on the left in both the foreground and background. So all I have to do is treat them the same way I've treated the other trees in the painting.
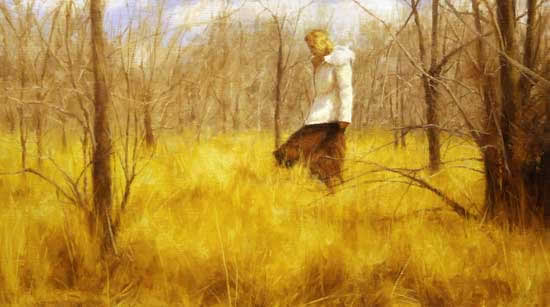
Step 13:
I always look at the painting in the mirror one last time to make sure nothing is incorrect or distracting from my focal point. Often an edge that is too sharp or a distracting brush stroke needs to be softened. Once those are corrected to my satisfaction, the painting is finished! |